


Chapter 2: Table of Contents
Gowning
Surgical gowns are made of the same materials used in the production of surgical drapes. They should be used for only one surgical procedure before being freshly laundered and sterilized (or discarded if a paper gown is used). Gowns have elastic wrist bands (cuffs) to facilitate easier gloving and the forearms and front panel may be reinforced with multiple layers or may be waterproofed. The gown wrist cuff should be covered by the gloves as it accumulates moisture and is considered unsterile after gloving is performed.
Cloth Gowns:
Surgical gowns are available in two types, woven and non-woven. Woven gowns are made from interlacing two strands of yarn at 90 degree angles from each other using smaller fibres made from natural or synthetic materials. A common woven gown material is all-cotton type 140 muslin, which means it has 140 threads per square inch of material. Type 140 muslin’s drawback is that when wet it allows ‘strike-through’; that is, bacteria can pass through the material pores easily. 270 pima cloth (also a woven material) has smaller pores than 140 muslin (10 mm) but it is still readily permeable to bacteria if wet unless it is treated with a water repellant finish (i.e. Quarpel) which prevents strike-through. Other woven gowns are made of a 50/50 blend of polyester and cotton that is woven tightly to prevent bacterial passage. However, these gowns must be regularly treated with a moisture repellant to create a bacterial barrier. Gore-Tex® treated gowns have a maximum pore size of 0.2 µm to prevent bacteria and liquid passage and appear to be most resistant to washing. Most cloth gowns have front panel that is reinforced with multiple layers or may be waterproofed.
Steps for Gowning
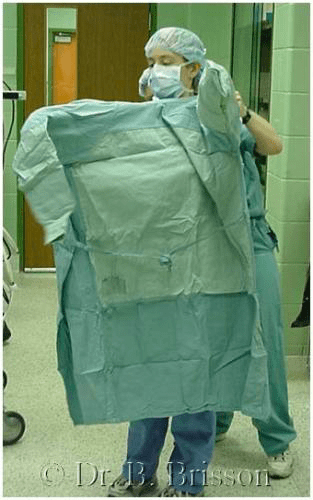
1) Pick up the gown in a way that does not contaminate the arms or front panel of the gown or any other materials (i.e. drapes) contained in the pack. Identifying the neck collar is usually the best way to orient yourself. Openings for the arms should be visible on either side of the neck collar. When picking up the gown, only the interior of the gown should come in contact with the prepared hands.
2) The surgeon should walk away from the table and into a space that will allow gowning without contaminating the gown on equipment such as lights or tables. The surgeon should slide both arms into the arm openings simultaneously and let the gown unfold gently.
3) An unsterile assistant will tie the neck and back ties to secure the gown on the surgeon’s shoulders without contaminating the front of the gown. Front tying gowns (i.e paper gowns at OVC) will be tied by the surgeon at the front of the gown (helped by a sterile or unsterile assistant who handles the paper tab) after gloving is completed.

Gowns have elastic wrist bands (cuffs) to facilitate gloving. The gown wrist cuff should always be covered by gloves as it accumulates moisture and is considered unsterile after gloving is performed. For this reason, closed gloving (see gloving section below) can only be performed at the onset of surgery. Should you contaminate or puncture your gloves, you will need to perform open gloving to replace them.
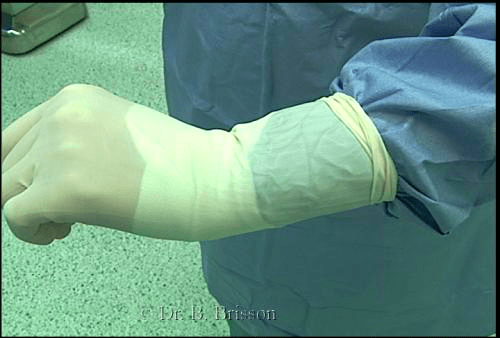
Various parts of the gown are considered unsterile such as the wrist cuff, back, neck, shoulder and underarm areas. Note that the back of a gown is considered unsterile even when using a sterile wrap around gown that does not require tying by an unsterile assistant. Also considered unsterile are any parts of a gown located below the waist or 2 inches above the elbow. To be safe, keep your hands within the area of the front chest panel and above your waist.

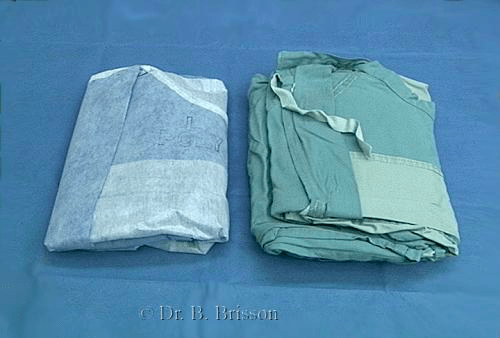
Folding and Sterilizing Gowns Prior to Use
Gowns are folded in a clean environment, wrapped in two layers of cloth (or paper) and steam sterilized prior to being used. Standard folding of gowns is necessary to ensure the gown remains sterile during the gowning process. Folding of a gown may vary between institutions.
Folding of gowns typically includes the following steps:
1) Lay the gown front side down on a clean table ensuring that the back panels are straight (let the sleeves hang on either side of the table).
2) Fold over the edges of the back panels with all ties directed laterally (longer wrap-around ties will hang on either side of the table).
3) The bottom of the gown is then grasped and folded over in a triple layer.
4) The top (shoulder) portion of the gown is also grasped and similarly folded in a triple layer. This results in a multi-layered, rectangular-shaped gown with the sleeves still hanging on either side.
5) The gown is then flipped over to visualize the front side of the gown at the level of the waist.
6) The long, wrap-around ties are located and tied loosely using an easy release knot.
7) Each sleeve is then folded over and back (double layer).
6) The gown edges are then folded over to meet in the middle of the gown and the gown is finally folded on itself once more.
8) The folded gown is ready to be wrapped (with a sterile hand towel) for sterilization.